Overview
DIY car detailing is a cost-effective way to keep your vehicle looking new, allowing you to control the process and learn valuable skills. Essential tools include microfiber towels, a quick detailer kit, car wash soap, and polish. The step-by-step process involves washing the exterior, cleaning wheels, drying, applying clay bar treatment, polishing, and waxing. Don't forget interior detailing for a complete clean. Regular maintenance with quick detailers can enhance shine and protect your investment. Start your DIY journey today for a beautifully maintained vehicle!
Frequently Asked Questions
1. What are the benefits of DIY car detailing?
2. What essential tools and products do I need for DIY car detailing?
3. What is the first step in the car detailing process?
4. How can I maintain my car's shine after detailing?
5. Why is interior detailing important?
When it comes to keeping your car looking its best, DIY car detailing is an excellent way to achieve a high-quality, sparkling finish without the hefty price tag of professional services. With just a few tools and products, you can make your vehicle shine like new. Whether you're a seasoned car enthusiast or a casual driver, the methods discussed here, including a quick detailer kit, will have you mastering the art of car detailing.
Why DIY Car Detailing?
Many car owners choose DIY detailing for several reasons. Not only does it save money, but it also provides complete control over the products and techniques used. Here are a few key benefits:
- Cost-Effective: Professional detailing can be expensive, often costing hundreds of dollars. DIY is budget-friendly.
- Control: You dictate the pace and style of your detailing, ensuring your car gets the attention it deserves.
- Learning Experience: DIY detailing is a fantastic way to learn about your vehicle and develop new skills.
- Thrill of Accomplishment: There’s nothing quite like seeing the sparkling results of your hard work.
Essential Tools and Products
Before diving into the world of DIY car detailing, ensure you have the right supplies on hand. Below is a list of essential tools and products that you should consider adding to your arsenal:
- Microfiber Towels: They are gentle on surfaces and less likely to scratch paintwork.
- Applicator Pads: Perfect for applying wax and sealants.
- Quick Detailer Kit: This is a must-have for maintaining paint shine between washes.
- Car Wash Soap: Specifically formulated car wash soap will protect your vehicle's finish.
- Wheel Cleaner: A dedicated wheel cleaner will help remove brake dust and grime.
- Polish and Wax: Essential for protecting your car’s paint and giving it a long-lasting shine.
Step-by-Step Car Detailing Process
Now that you're equipped with the right tools, let’s explore a simple yet effective process to detail your car thoroughly.
Step 1: Wash the Exterior
The first step in any car detailing process is to wash the exterior. Begin by rinsing your vehicle with water to remove loose dirt and debris. Follow these steps for a thorough wash:
- Use two buckets — one with soapy water and another with clean water for rinsing your wash mitt.
- Start at the top of the car and work your way down, ensuring you wash in straight lines.
- Rinse the mitt frequently to avoid scratching the paint.
- Rinse the vehicle thoroughly, ensuring all soap residue is removed.
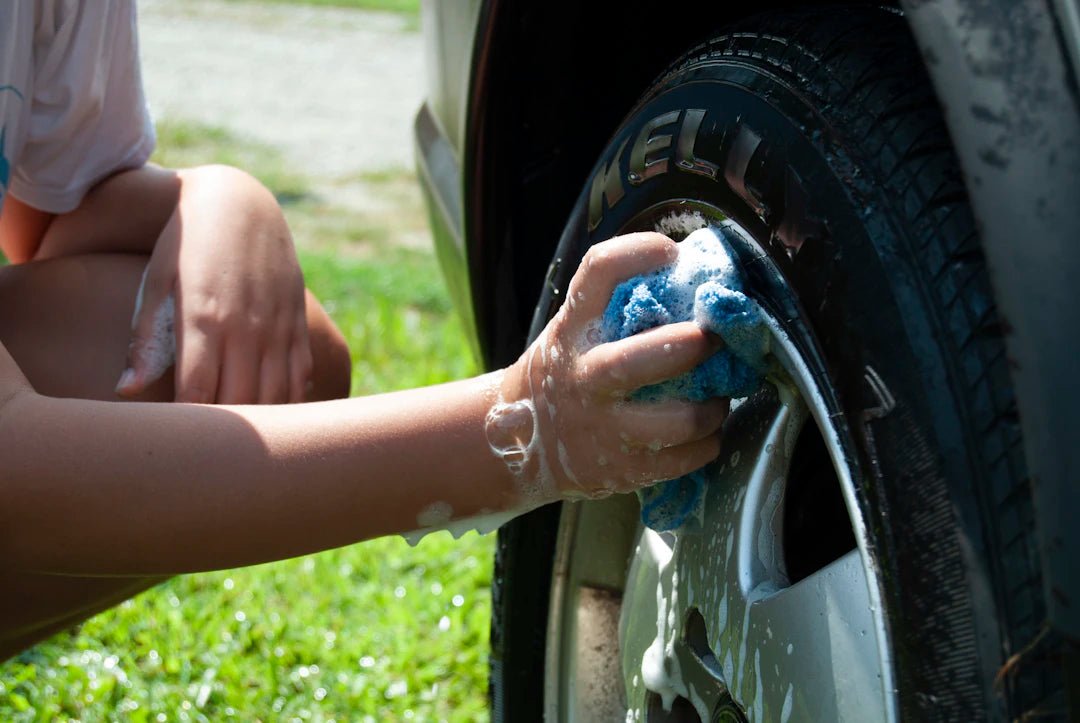
Step 2: Clean the Wheels
While the car is wet from the wash, clean the wheels. It’s better to do this while the grime is softened. Use the following tips:
- Apply a wheel cleaner specifically designed for your wheel finishes (chrome, alloy, etc.).
- Use a separate brush to clean between spokes and in tight spots.
- Rinse the wheels thoroughly with water.
Step 3: Dry the Exterior
Once your car is squeaky clean, it's time to dry it. Use microfiber towels to avoid scratching the surface. Here are some tips:
- Pat dry rather than wiping to avoid swirling.
- Start from the roof and move downwards, ensuring no spots are left damp.
Step 4: Apply Clay Bar Treatment
Your car's paint may still have embedded contaminants even after washing. This is where a clay bar treatment comes in:
- Use a lubricating spray to help the clay glide over the paint.
- Work on small sections, kneading the clay periodically to reveal a fresh surface.
- Wipe the area clean and repeat until the entire vehicle is done.
Step 5: Polish the Paint
Polishing helps to remove minor scratches and enhances the paint's depth. Follow these steps:
- Apply a small amount of polish to your applicator pad and work in small sections.
- Using a circular motion, apply the polish evenly over the surface.
- Buff with a clean microfiber towel until you achieve a glossy finish.
Step 6: Wax the Surface
The final step in protecting your vehicle’s finish is to apply a wax. This acts as a barrier against dirt and UV damage:

- Use an applicator pad to apply the wax in circular motions.
- Allow the wax to haze over before buffing with a clean towel.
- Ensure complete coverage, working panel by panel.
Maintaining That Shine with a Quick Detailer Kit
Once you've invested the time into detailing your car, keeping it looking fresh is essential. This is where a quick detailer kit comes into play. Quick detailers are designed to enhance shine, add a layer of protection, and help remove light dust or fingerprints between washes.
Here’s how to efficiently use a quick detailer kit:
- Keep a bottle in your trunk for quick touch-ups.
- Spray a light mist onto a microfiber towel, then wipe down areas, avoiding direct sunlight.
- Use it on both the body and glass for a comprehensive clean.
The Power of Interior Detailing
Your car’s interior deserves just as much attention as the exterior. Dust, dirt, and allergens can accumulate, affecting air quality and overall comfort. Here’s how to detail your car's interior:
Step 1: Remove Debris
Start by removing all items from the interior, including floor mats, trash, and any personal belongings. This will give you room to work and ensure no areas are missed.
Step 2: Vacuuming
Use a vacuum cleaner with a hose and brush attachments to clean seats, floors, and tight areas:
- Vacuum seats, especially in the creases where dirt can accumulate.
- Make sure to reach under the seats and around pedals.
Step 3: Cleaning Surfaces
Next, clean all surfaces, including the dashboard, doors, and center console:
- Use a designated interior cleaner or a mild soapy solution.
- Employ microfiber cloths to avoid scratches and maintain a shiny finish.
Don’t Forget the Windows
Clear windows are vital for driving safety and aesthetics. Use a quality glass cleaner for the best results:
- Spray the cleaner on the glass and wipe using vertical or horizontal motions.
- Remember to clean interior windows for maximum visibility.
Final Touches to Elevate Your Detail
After a detailed cleaning, consider these final touches to make your car truly shine:
- Rotate and clean your tires using a tire dressing for an extra pop.
- Consider refreshing your car’s air freshness with an interior scent to elevate the experience.
- If applicable, clean and condition leather seats to keep them supple and looking new.
Unlocking More Benefits
Car detailing is not just about aesthetics; it’s also about protecting your investment. Regular detailing can help maintain or even increase your vehicle's resale value by keeping the interior and exterior in optimum condition. Plus, a well-maintained car runs better, enhancing the overall driving experience.
Your Car Deserves It!
Taking the time to detail your vehicle can lead to remarkable benefits, from improved aesthetics to enhanced performance. With some basic equipment and techniques, including clever use of a quick detailer kit, you can achieve that sparkling finish you’ve always dreamed of. Remember to maintain your car regularly, and you'll reap the rewards of your hard work for years to come.
So why wait? Start your DIY car detailing journey today and enjoy the satisfaction of a beautifully maintained vehicle!
Linked Product

Quick Detailer Full Size Kit
The Quick Detailer Full Size Kit offers an efficient solution for maintaining your vehicle's appearance, providing both interior and exterior cleaning options. Its formula is designed to deliver a streak-free finish while adding a protective gloss, making it suitable for regular upkeep. This kit is ideal for those looking to achieve a polished look without extensive detailing efforts.
View Product